30 Minute Rule: IFU and AORN Surgical Instrument Care for SPD & OR
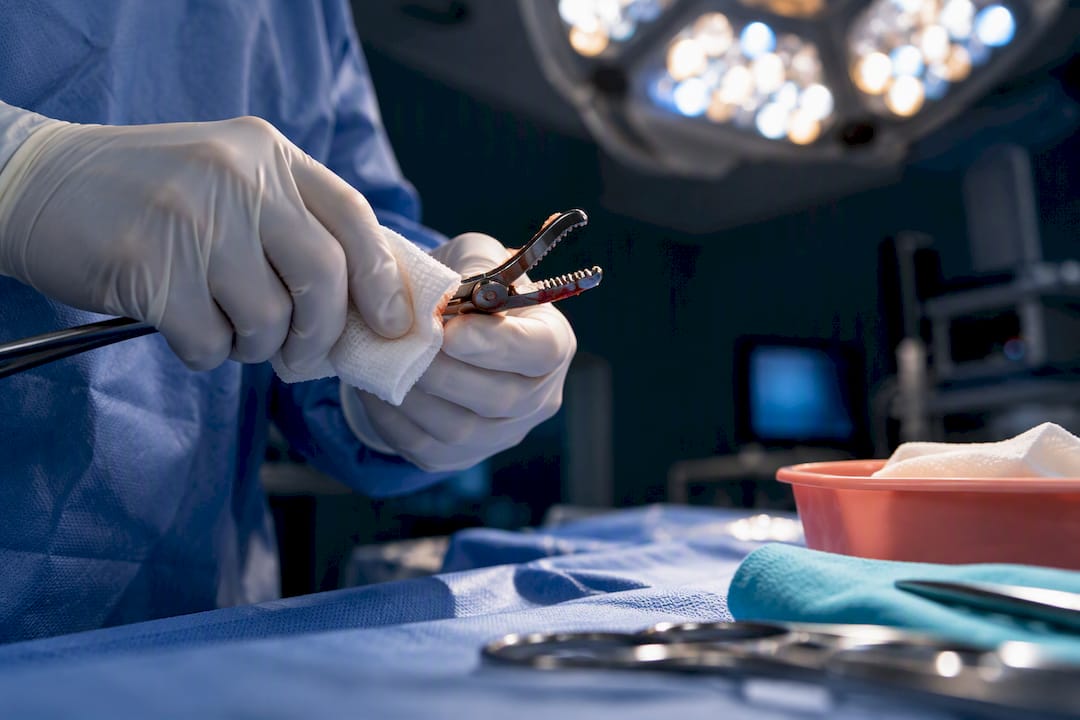
Safe reprocessing follows one fixed sequence: point-of-use precleaning, manual or automated cleaning, inspection and function testing, lubrication with a steam-permeable oil, packaging, validated sterilization, and dry storage. Skip a step or reorder it, and instrument failures, corrosion, or sterilization failures follow. The rule that overrides every generic protocol: always defer to the instrument manufacturer’s IFU alongside current AORN and AAMI guidance, and apply lubricant only after cleaning and rinsing, never before sterilization.
TL;DR:
Proper decontamination should occur within 30 minutes of use to prevent dried soil from adhering and becoming harder to remove, especially from lumens.
Manual, ultrasonic, and washer-disinfector cleaning methods each serve different instrument types and often require multiple steps for thorough sanitation.
Visual and functional inspection before sterilization is essential to identify issues like damage, residual soil, or corrosion, with lubrication performed only after cleaning.
Packaging must ensure steam penetration and contamination protection, with validated sterilizer cycles tailored to instrument type and load configuration.
Following manufacturer IFUs is mandatory, with SOPs, validation, and validation records controlling safe reprocessing and storage protocols.
Table of Contents
What Does Surgical Instrument Care Actually Involve At The Point Of Use?
Surgical instrument care starts the moment an instrument leaves the sterile field, not when it reaches sterile processing. Blood, tissue, and saline dry fast under OR lighting, and dried bio-burden is dramatically harder to remove than fresh soil. That single fact drives every point-of-use rule that follows.
Gross soil comes off immediately with a saline-moistened sponge or spray gel, and lumens get flushed so channels don’t clog before they ever reach the sink. Instruments with box locks, ratchets, or multiple parts should be opened or disassembled per the manufacturer’s IFU so soil trapped in hinges doesn’t bake on during transport.
Timing matters more than most staff realize. The goal is decontamination within 30 minutes of use; when that’s not possible, instruments should at minimum be rinsed or kept moist with a foam, gel, or damp towel to prevent drying. Rinse water, where used at this stage, should stay under 95°F (35°C), since heat sets protein soil the same way it sets an egg.
Transport requires a closed, leak-proof, labeled container, never an open tray riding loose on a cart. That single practice prevents cross-contamination between sets and protects transport staff from exposure.
Remove gross soil at the point of use; don’t let blood or saline dry on the surface.
Keep lumens and cannulated instruments flushed and open.
Disassemble multi-part instruments where the IFU allows.
Decontaminate within 30 minutes, or keep instruments moist if delayed.
Rinse below 95°F (35°C) to avoid setting protein soil.
Transport in closed, labeled, leak-proof containers.
Wear cut-resistant gloves and eye protection when handling contaminated trays; never sort or pre-rinse instruments bare-handed.
Instrument care is a shared responsibility across OR staff, transport personnel, and sterile processing, and that handoff is exactly where soil gets baked on or trays get mixed if nobody owns the correct solutions and separate handling steps.
Which Cleaning Method Fits Which Instrument?
Manual cleaning, ultrasonic cleaning, and automated washer-disinfectors each solve a different problem, and most sets need at least two of the three before they’re truly clean.
Manual cleaning handles delicate, cannulated, or complex instruments that automated equipment might damage or fail to reach. The process runs in a defined order:
Disassemble the instrument fully per the IFU.
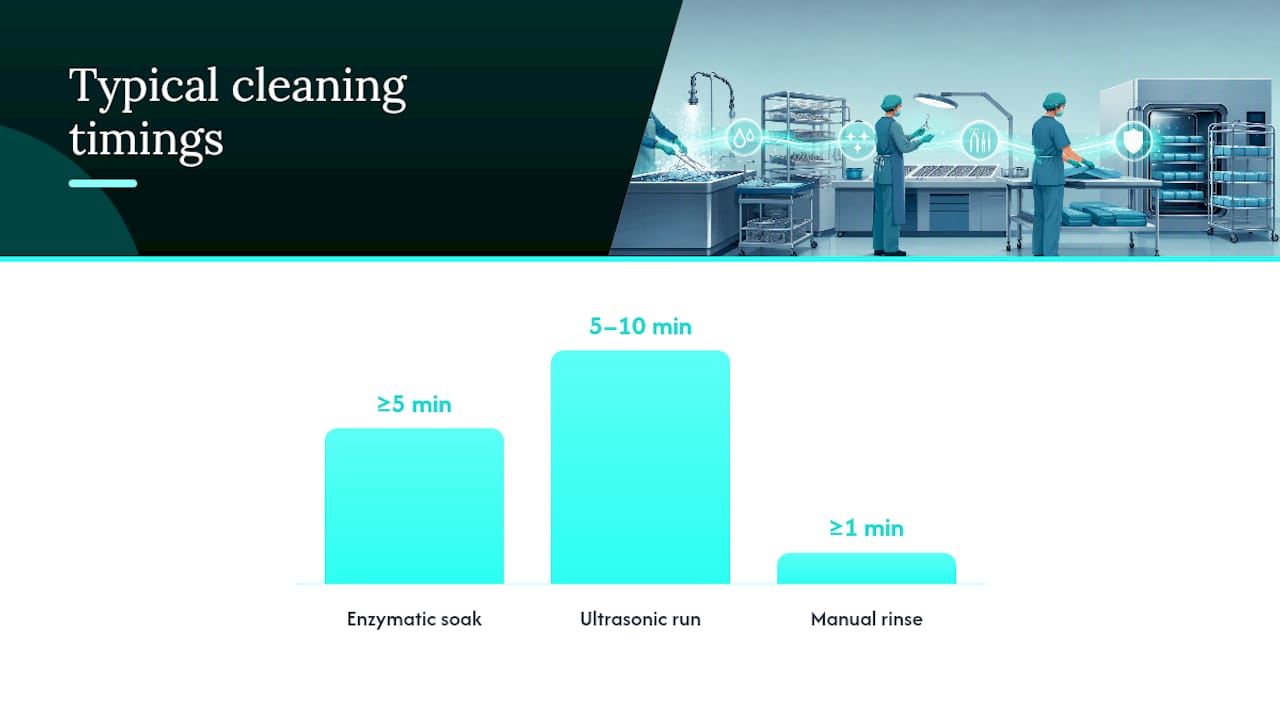
Soak in a neutral-pH enzymatic detergent (pH 6 to 8.5) for at least 5 minutes to loosen bio-burden before scrubbing.
Brush all surfaces, hinges, and serrations with a soft-bristle brush, actuating joints and ratchets while submerged to avoid aerosolizing pathogens.
Flush lumens with a syringe or pressure gun, using a brush sized to the channel diameter.
Rinse thoroughly under running water for at least a minute, then follow with a purified final rinse.
Ultrasonic cleaning works through cavitation: sound waves generate microscopic bubbles that implode against instrument surfaces, dislodging soil from crevices no brush can reach. It’s a strong second stage after gross soil removal, not a substitute for it. Instruments should be fully submerged, opened, and never touching each other or the tank bottom, since contact interferes with cavitation and can chip delicate edges. Run times of roughly 5 to 10 minutes are typical, though the instrument IFU sets the final word.
Washer-disinfectors are the preferred method whenever equipment allows it, because validated cycles built to ISO 15883 remove human variability from the process. A standard cycle runs prewash, enzymatic wash, rinse, thermal disinfection, and drying, and loading trays correctly (open jaws, no nesting, lumens connected to irrigation ports) is what separates a passed cycle from a failed one.
Detergent choice ties all three methods together: stick to neutral or enzymatic formulations in the 6 to 8.5 pH range, and never mix in chlorine-based or oxidizing agents, which pit stainless steel over time.
Pro Tip: Run your final rinse with deionized or reverse-osmosis water whenever your facility’s plumbing allows it. Tap water minerals leave spotting that mimics corrosion and can trigger unnecessary instrument rejection during inspection.
How Do You Inspect And Maintain Instruments Before Sterilization?
Every instrument gets a visual and functional check before it’s packaged, and this step catches problems that cleaning alone won’t reveal. A bright light and magnification lens turn up more failures than the naked eye ever will.
Check for residual soil, discoloration, or spotting under magnification.
Look for pitting, rust, or corrosion, especially near box locks and serrations.
Inspect for hairline cracks, particularly on scissors and forceps tips.
Actuate every hinge and ratchet through its full range of motion.
Test cutting edges for nicks, dullness, or misalignment.
Flush lumens again to confirm patency after cleaning.
Confirm insulation integrity on any electrosurgical instruments.
Anything that fails gets logged, tagged, and routed to repair or retirement according to the manufacturer’s IFU, never returned to service on a supervisor’s judgment call alone.
Lubrication happens here, after cleaning and rinsing are complete and before packaging, never earlier. Applying oil to a soiled instrument just traps bio-burden underneath it. The lubricant itself matters as much as the timing: water-based, steam-permeable formulas free of silicone and mineral oil are the standard, since silicone and petroleum-based oils can block steam penetration during sterilization and leave residue that interferes with future cleaning cycles.
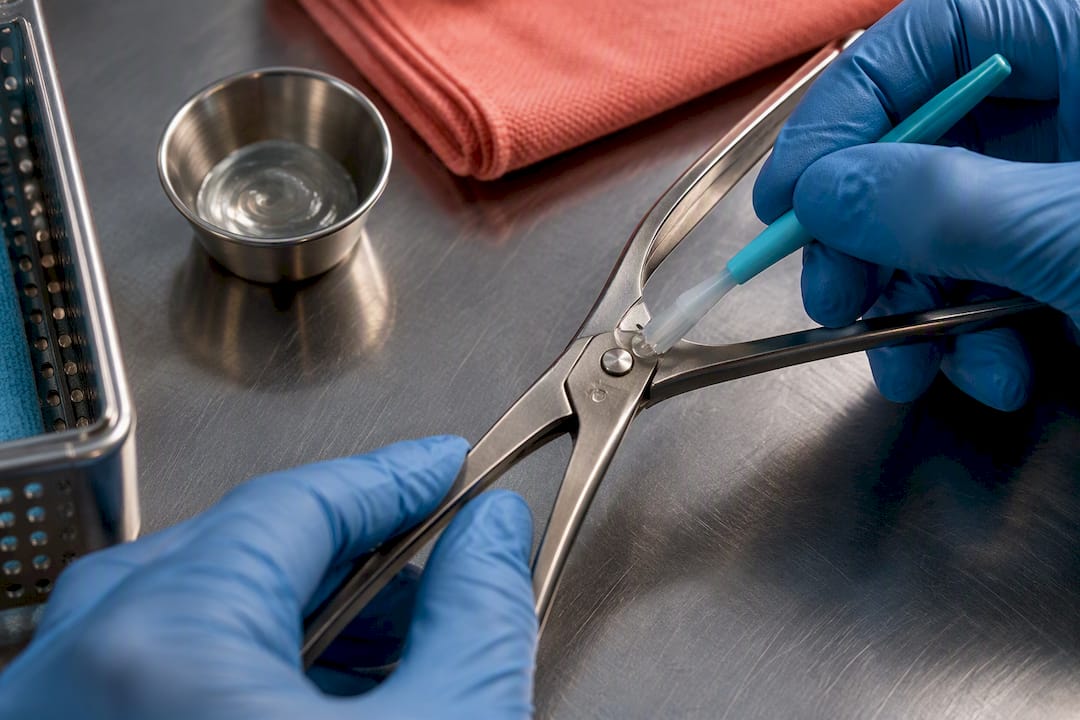
Dosing depends on the delivery method. Automated systems that inject lubricant into the final rinse cycle typically run at 0.05 to 0.13 oz per gallon (0.4 to 1.0 ml/L), while a manual immersion bath calls for a stronger concentration, generally 20 to 40 ml per liter, according to Getinge’s product guidance for its steam-permeable lubricant line. Queenssurgical’s guide to instrument milk walks through how these products fit into a typical SPD workflow if your facility is still choosing between automated dosing and manual bath application.
Log every lubrication cycle alongside inspection results. That record is what tells you, six months from now, whether a particular tray is wearing out faster than it should.
What Packaging And Sterilization Steps Matter Most?
Packaging choice depends on the instrument and the sterilizer, but the underlying rule never changes: whatever wraps the instrument has to let steam in and keep contamination out until the moment of use.
Rigid containers work well for heavy instrument sets and offer reusable, durable protection, but they must stay within the manufacturer’s specified weight limits to avoid bent trays and steam penetration failures.
Sterilization wrap suits smaller sets and single instruments, and it needs to be free of tears, punctures, or seal failures before it goes into the sterilizer.
Every package needs a chemical indicator and, for implant loads, biological monitoring per facility policy.
Peel pouches work for individual instruments but should never be double-pouched in a way that blocks steam flow to the inner layer.
Reusable instruments require pre-vacuum, dynamic-air-removal steam cycles in nearly every modern sterile processing department, since gravity-displacement cycles struggle with lumens and dense trays. The exact cycle time, temperature, and dry time come from the sterilizer manufacturer and the instrument IFU together, not from a generic chart on the wall.
Cleaning adequacy determines sterilization success more than any other variable. Effective cleaning and disinfection is indispensable to sterilization, since residual bio-burden shields microorganisms from steam contact regardless of cycle length or temperature. Residual detergent or excess lubricant creates the same problem, forming a barrier steam can’t penetrate.
Validation is a facility responsibility, not a manufacturer guarantee. IQ/OQ/PQ documentation (installation, operational, and performance qualification) has to reflect your actual sterilizer, your actual loads, and your actual water quality. A cycle validated on a half-empty chamber somewhere else doesn’t automatically transfer to your fully loaded rigid containers. Queenssurgical’s overview of cleaning versus disinfection versus sterilization breaks down where each step’s responsibility starts and ends if your SOP documentation needs that distinction spelled out for staff training.
How Should Sterile Instruments Be Stored And Handled?
Sterile storage protects everything the previous six steps accomplished, and it’s often where facilities lose ground through simple neglect. Sterile packages belong in a dry, ventilated area, shielded from direct sunlight, temperature swings, humidity, and pest access. A storage room next to a loading dock door or under a leaking pipe undoes hours of careful reprocessing.
Inspect package integrity immediately before use; any tear, moisture stain, or seal failure means the contents get reprocessed, not opened.
Store heavier rigid containers on lower shelves to avoid crushing lighter wrapped trays.
Rotate stock so older sterile dates get used first.
Reprocess and document every loaner or rental set on return, and request the vendor’s decontamination certificate if one is supplied.
Track reuse cycles against the instrument IFU, since many instruments have a defined maximum number of sterilization cycles before metal fatigue sets in.
A tray that’s been autoclaved 400 times behaves differently from one autoclaved 40 times, even if both look clean and pass a visual check. That’s why cycle counts and repair logs matter as much as the daily inspection checklist.
What Standards And IFUs Govern Instrument Reprocessing?
Manufacturer IFUs take precedence over generic protocols every time they conflict, because the company that built the instrument knows its tolerances better than any general guideline can. That said, IFUs work alongside broader standards, not instead of them.
The AORN Guideline for Care and Cleaning of Surgical Instruments, effective October 16, 2025, reflects a current, systematic evidence review and is the reference most facilities anchor their SOPs to.
AAMI and ANSI standards inform sterilizer cycle parameters and detergent chemistry referenced throughout most manufacturer IFUs.
ISO 15883 governs washer-disinfector validation, the benchmark most automated cleaning equipment is built to meet.
Facilities own IQ/OQ/PQ validation, routine preventive maintenance, and documented staff competency checks, none of which a manufacturer can complete on your behalf.
Every SOP should cite the specific IFU it’s built from, and every validation record, maintenance log, and competency check needs a retrievable file. An auditor asking “show me” should never be met with a shrug.
How Queens Surgical Supports Instrument Care In Practice
Sourcing the right consumables is part of getting instrument care right, not separate from it. Queenssurgical’s instrument milk guide and lubricating jelly product page give sterile processing teams practical references for the steam-permeable lubricants this guide recommends, without asking you to compare five vendors to find one that meets IFU standards.
A Checklist Mindset Beats A Memorized One
SPD leaders get the most value from this guide by treating it as an audit tool, not a one-time read. Build competency checks around IFU alignment, schedule quarterly spot audits against the checklists above, and require supplier validation documentation before any new lubricant or detergent enters the department.
— QB
Where To Find Reliable Instrument Care Supplies
Queenssurgical’s advantage isn’t a longer catalog. It’s thirty years of supplier relationships that keep the steam-permeable lubricants, enzymatic detergents, and consumables this guide recommends in stock and competitively priced for facilities of every size, whether you’re ordering one case or outfitting a hospital system.
The Queenssurgical catalog covers medical instruments and tools, wound care, PPE, and disposables alongside the lubricants and cleaning consumables sterile processing departments burn through weekly. Wholesale accounts get volume pricing without a long-term contract, and retail orders ship the same way. If you’re stocking a full SPD line or just need a reliable second source for lubricant when your current supplier runs short, browse the current catalog or contact the sales team directly for bulk quotes and validated-supplier documentation.
Sources
FAQ
What Are The Core Principles Of Caring For Surgical Instruments?
The core principles are prompt point-of-use precleaning, correct cleaning method selection, thorough inspection and function testing, appropriate lubrication, proper packaging, validated sterilization, and controlled dry storage. Every step depends on following the instrument manufacturer’s IFU rather than a generic protocol.
What Do The AORN Guidelines Say About Instrument Cleaning?
The AORN Guideline for Care and Cleaning of Surgical Instruments, effective October 16, 2025, provides current, evidence-reviewed recommendations covering point-of-use treatment, cleaning verification, and inspection practices. Most sterile processing departments build their written SOPs directly from this guideline alongside their instrument IFUs.
How Often Should Surgical Instruments Be Lubricated?
Instruments get lubricated after every cleaning cycle and before sterilization, not on a calendar schedule. Automated systems typically dose lubricant into the final rinse at 0.05 to 0.13 oz per gallon (0.4 to 1.0 ml/L), while manual immersion baths run stronger, around 20 to 40 ml per liter.
What Makes A Good Cleaner For Surgical Instruments?
A good cleaner is a neutral or enzymatic detergent in the 6 to 8.5 pH range, free of chlorine, oxidizing agents, or harsh solvents that pit stainless steel. Facilities should also use softened water for the initial rinse and purified water for the final rinse to avoid mineral deposits that mimic corrosion.
Does Queens Surgical Sell Instrument Lubricants And Cleaning Supplies?
Yes, Queenssurgical stocks lubricating jelly and related consumables referenced in standard sterile processing workflows, alongside its broader medical instruments and tools category. Current pricing for these items is listed directly on the product pages.
Recommended
Comments