How Blood Pressure Cuffs Work Explained
- Qubit Technology
- 1 day ago
- 13 min read

A blood pressure cuff works by inflating a bladder around the arm until it fully occludes the brachial artery, then slowly releasing that pressure while a listener, sensor, or algorithm tracks the exact moments blood flow resumes and then becomes smooth again. The first moment gives you systolic pressure. The second gives you diastolic. Everything else, the stethoscope, the digital display, the pump, is just a different way of catching those two events.
Two measurement families do this job, and they catch the signal in completely different ways:
Auscultatory (manual): a clinician inflates a manual sphygmomanometer, then listens through a stethoscope for Korotkoff sounds as the cuff deflates.
Oscillometric (automated): an electronic monitor detects tiny pressure oscillations in the cuff itself, builds an oscillometric waveform centered on mean arterial pressure, then runs an algorithm to estimate systolic and diastolic values.
The clinical rule behind both methods is nearly identical: inflate to roughly 30 mmHg above the point where the radial pulse disappears, then deflate at about 2 to 3 mmHg per second. If you rush that deflation, you lose accuracy no matter which method you’re using.
Key Takeaways
A blood pressure cuff produces a reading by occluding the brachial artery, then detecting the exact cuff pressures at which turbulent flow resumes (systolic) and smooths into laminar flow (diastolic).
Point | Details |
Two measurement families | Auscultatory relies on Korotkoff sounds; oscillometric detects cuff pressure oscillations and estimates values algorithmically. |
Follow the 30/2 to 3 rule | Inflate 30 mmHg above pulse disappearance, then deflate at 2 to 3 mmHg per second for accuracy. |
Cuff size drives error | A bladder too small for the arm systematically overestimates blood pressure. |
Prep the patient properly | Five minutes of rest, bare arm at heart level, and silence during the reading prevent most avoidable errors. |
Source validated equipment | Queenssurgical supplies properly sized upper-arm cuffs and barrier sleeves to support accurate, hygienic readings between patients. |
Table of Contents
How Do Blood Pressure Cuffs Work in Manual Auscultation?
The manual method is older, cheaper, and, when done right, still the reference standard most automated devices get measured against. It’s also easy to botch if you rush it.
Wrap the cuff around the bare upper arm with the bladder centered over the brachial artery, roughly 2 to 3 cm above the elbow crease.
Find the radial pulse at the wrist and inflate the cuff until that pulse disappears.
Inflate 30 mmHg further above that point. This buffer accounts for individual variation and prevents you from starting your reading too close to actual systolic pressure.
Place the stethoscope diaphragm directly over the brachial artery, just below the cuff’s edge, without pressing hard enough to distort the vessel.
Deflate slowly, at 2 to 3 mmHg per second. Faster than that and you’ll miss the first sound; slower and you risk venous congestion that skews diastolic readings.
Record systolic pressure at the first audible tapping sound (Korotkoff phase I).
Record diastolic pressure when sounds disappear entirely (Korotkoff phase V).
Those tapping sounds exist because turbulent, jetting blood flow through a partially compressed artery makes noise; laminar flow through an open artery does not. That’s the entire physical basis of the auscultatory method, and it’s why a stethoscope can do what your fingers can’t.
One quirk trips up nearly every trainee at some point: the auscultatory gap. Sounds can appear, vanish for a stretch of 10 to 40 mmHg, then reappear lower down. If you started your cuff inflation too low, you might catch the second re-emergence of sound and record it as systolic, badly underestimating the true value. Inflating well above the point where the radial pulse vanishes is what protects you from this trap.
Pro Tip: Terminal digit preference is a real and well-documented bias, meaning clinicians unconsciously round readings to numbers ending in 0. Read the manometer at the exact mmHg mark you hear the sound, not the nearest tidy number, and take the reading in a quiet room where you can actually hear phase V disappear.
What Does an Automated Cuff Actually Measure?
Automated monitors don’t listen for anything. They feel for it, and what they feel is subtler than most people assume.
As the cuff deflates, arterial pulsations transmit tiny pressure ripples into the cuff bladder itself. A pressure transducer inside the device picks up these oscillations layered on top of the slow, steady decline in cuff pressure. Early in deflation, when the cuff still fully occludes the artery, oscillations are minimal. As cuff pressure drops toward the artery’s true internal pressure, the oscillations grow, peak, then shrink again as the cuff pressure falls further below diastolic.
That peak is the key. It occurs at or near mean arterial pressure, and the device treats it as an anchor point. From there, systolic and diastolic values aren’t measured directly at all. They’re estimated using empirical ratios and proprietary algorithms that manufacturers develop by comparing thousands of oscillometric readings against simultaneous auscultatory or intra-arterial measurements.
That single fact explains a lot of confusion patients and even clinicians run into:
Two monitors on the same arm, at the same moment, can legitimately disagree by several mmHg because their underlying algorithms differ.
Oscillometric accuracy degrades with irregular rhythms, especially atrial fibrillation, because the algorithm assumes a fairly regular pulse-to-pulse pattern.
Weak pulse amplitude, whether from cold extremities, low cardiac output, or a poorly fitted cuff, produces a flatter oscillation envelope and less reliable estimates.
Any arm or body movement during the reading introduces motion artifact that the algorithm can misread as a pulse oscillation.
The signal you’re capturing is not the arterial waveform itself. It’s a filtered, cuff-transmitted echo of that waveform, shaped by cuff compliance, tubing length, and the manufacturer’s own signal-processing choices. Two devices from the same company can even output slightly different numbers depending on firmware version, because they’re not measuring blood pressure directly. They’re inferring it.
Cuff Anatomy: The Parts That Actually Change Your Reading
Every part of a blood pressure cuff has a job, and a failure in any one of them throws off the whole reading.
Bladder: the inflatable rubber pouch inside the cuff that applies pressure directly over the artery. Its length and width, not the outer fabric size, determine whether the cuff fits the patient.
Outer cuff (cover): the fabric sleeve, usually with a hook-and-loop closure, that holds the bladder in place and transmits pressure evenly.
Tubing: connects the bladder to the manometer or transducer and, on manual units, to the inflation bulb. Cracks or leaks here cause slow, unexplained pressure drift.
Manometer or transducer: the aneroid dial, mercury column, or electronic sensor that displays cuff pressure. Aneroid dials drift out of calibration over time; mercury columns are the historical accuracy reference but have largely been phased out for environmental and safety reasons.
Inflation bulb or pump: manual units use a hand bulb with a release valve; automated units use a small electric pump.
Stethoscope: only relevant to manual measurement, but diaphragm quality and ear tip seal both affect whether you actually hear phase I and phase V clearly.
Cuff sizing deserves its own attention because it’s the single most common source of systematic error. A bladder that’s too short or too narrow for the arm won’t fully compress the artery at the pressure it should, so the device or clinician has to inflate higher to occlude flow, which inflates the reading. A too-large cuff on a thin arm can do the opposite, underestimating pressure.
Arm circumference | Recommended cuff type | Common error if mismatched |
— | Small adult / pediatric | Standard cuff overestimates pressure |
— | Standard adult | Generally accurate if bladder fits |
— | Large adult | Standard cuff overestimates pressure |
— | Thigh cuff / extra-large adult | Standard cuff significantly overestimates pressure |
Disposable barrier sleeves placed between the cuff and the patient’s skin address a separate problem entirely: cross-contamination in busy clinics. They add negligible thickness and don’t meaningfully change readings, but they matter for infection control between patients.
Getting the Patient Ready for an Accurate Reading
Technique on the cuff means little if the patient wasn’t ready for the reading in the first place. Preparation errors account for a surprising share of the swings between visits.
Before the cuff even goes on, the patient should rest quietly for five minutes, seated with their back supported and feet flat on the floor. No caffeine, exercise, or smoking in the 30 minutes prior. The bladder should be empty. None of this is bureaucratic box-checking. Each of these variables independently raises systolic pressure by a measurable margin if ignored.
Once positioned:
Bare the upper arm completely; a rolled-up sleeve that compresses the arm above the cuff can raise the reading.
Support the arm so the cuff’s midpoint sits level with the heart, roughly at the fourth intercostal space when seated.
Wrap the cuff bladder centered over the brachial artery, about 2 to 3 cm above the elbow crease, snug but not tight.
Keep the patient silent and still during inflation and deflation. Talking alone can raise systolic readings.
On a patient’s first visit, measure both arms. A difference of more than 10 to 15 mmHg between arms is common and clinically meaningful; use the arm with the consistently higher reading for every future measurement.
Pro Tip: If you can’t get the patient’s arm perfectly level with the heart, err on the side of raising it slightly rather than letting it hang. A dangling arm below heart level can add several mmHg purely from hydrostatic pressure, and that error is easy to miss when you’re moving fast between patients.
Why Do Blood Pressure Readings Come Out Wrong?
Most inaccurate readings trace back to a short list of repeat offenders, and nearly all of them are fixable in under a minute.
Wrong cuff size for the patient’s arm circumference.
Cuff placed over clothing instead of bare skin.
Patient talking or moving during the reading.
Arm positioned below or above heart level.
Deflation happening too fast to catch phase I or phase V accurately.
Skipping the five-minute rest period.
Using a wrist device without keeping the wrist exactly at heart level, which magnifies hydrostatic error compared to upper-arm cuffs.
When a reading looks off, work through it methodically rather than just repeating the same measurement. Re-check position and cuff fit first, then re-measure. Compare both arms if you haven’t already. If a clinic has a second, known-accurate device, cross-check against it. Small discrepancies between two properly used devices, typically a few mmHg, are normal and expected given how oscillometric algorithms work. Larger gaps point to a calibration problem or a technique error, not device failure by default.
Issue observed | Likely cause | Corrective action |
Readings consistently higher than expected | Cuff too small, unsupported arm, cold room | Re-fit cuff, support arm at heart level |
Readings inconsistent between attempts | Talking, movement, rushed deflation | Standardize rest period, deflate at 2 to 3 mmHg/sec |
Large gap between two devices | Algorithm difference or one device miscalibrated | Cross-check against a validated reference device |
Erratic or unreadable oscillometric result | Irregular heart rhythm or motion artifact | Switch to manual auscultation if arrhythmia suspected |
Before relying on any automated monitor, confirm it appears on a recognized clinical validation list rather than assuming FDA clearance alone guarantees accuracy against auscultatory reference standards. Aneroid manometers should be checked against a mercury column or an electronic reference periodically, since the spring mechanism drifts with use.
Ambulatory and Invasive Monitoring: Beyond the Office Cuff
A single office reading is a snapshot. Sometimes clinicians need a movie instead, and that’s where ambulatory and invasive monitoring come in.
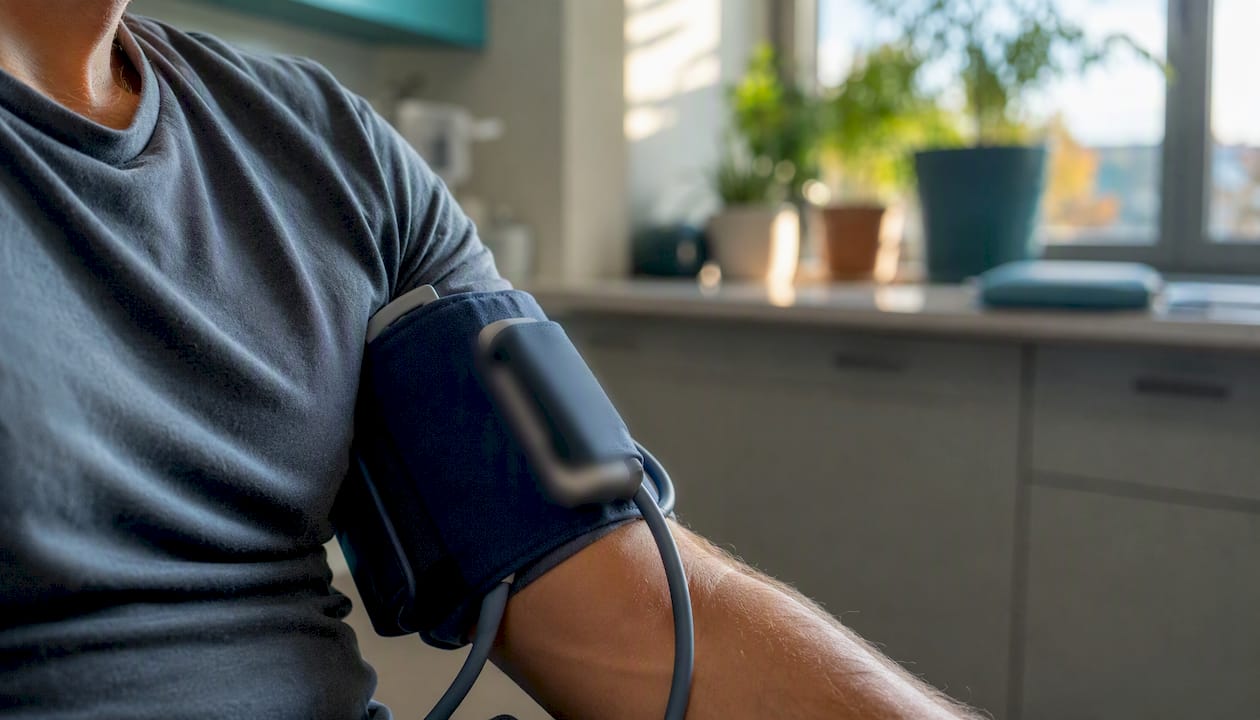
Ambulatory blood pressure monitoring uses an automated oscillometric cuff programmed to take readings every 15 to 30 minutes over a full 24 hour period while the patient goes about normal life. It’s the preferred method for catching white coat hypertension, where readings spike only in clinical settings, or masked hypertension, where office readings look normal but pressure runs high elsewhere.
Invasive arterial monitoring sits at the opposite end of the spectrum. A catheter placed directly in an artery, most often radial, connects to a pressure transducer that provides continuous, beat-to-beat pressure data. It’s reserved almost entirely for intensive care and operating room settings where hemodynamic instability can develop in seconds and intermittent cuff readings simply can’t keep up.
Method | Continuity | Typical accuracy | Invasiveness | Typical setting |
Office cuff (auscultatory/oscillometric) | Intermittent, single snapshot | Reference standard when technique is correct | None | Clinic, home |
Ambulatory monitoring | Intermittent, every 15 to 30 minutes | Good, reflects daily variation | None | Outpatient, 24-hour wear |
Invasive arterial line | Continuous, beat-to-beat | Highest for real-time changes | High, requires arterial access | ICU, operating room |
For most patients and most visits, cuff-based readings, taken correctly, remain entirely sufficient. Ambulatory and invasive methods exist to answer questions a single cuff reading structurally cannot.
A Practical Home-Measurement Routine Worth Following
Home readings only help a clinician if they’re collected the same way every time. Random one-off checks throughout the day tell you almost nothing useful.
Take readings at the same times each day, typically morning and evening, before medication and meals.
Rest quietly for five minutes beforehand, seated with back supported and feet flat.
Take two readings, one to two minutes apart, and record both rather than averaging in your head.
Use the arm identified as higher during your last clinical visit.
Sit with the cuff at heart level and stay silent during measurement.
Each reading is only as useful as the context around it, so log more than just the numbers:
Systolic and diastolic values from both readings, plus heart rate if the device shows it.
Time of day and which arm was used.
Anything unusual beforehand: caffeine, exercise, stress, or a missed medication dose.
Stick with a validated upper-arm device rather than a wrist or finger monitor. Wrist units are far more sensitive to exact hand position relative to the heart, and a few centimeters of error can shift the reading by several mmHg. MedlinePlus and the CDC both recommend upper-arm cuffs for home use specifically because they’re less prone to that kind of positioning error.
The Technical Recap That Actually Matters
Strip away the equipment differences and every blood pressure reading, manual or automated, comes down to the same three-stage event inside the artery.
Occlusion: cuff pressure exceeds systolic pressure, and blood flow through the brachial artery stops completely.
Turbulent reopening: as cuff pressure drops below systolic, blood jets through the narrowed artery in bursts, producing Korotkoff sounds or oscillometric pulsations. This point marks systolic pressure.
Laminar flow: cuff pressure drops below diastolic pressure, flow becomes smooth and continuous, and sound or oscillation amplitude changes distinctly. This point marks diastolic pressure.
Before trusting any reading, run through the fundamentals: confirm the cuff size actually fits the arm, standardize the five-minute rest and positioning routine every time, favor devices on a recognized validation list, and check both arms if there’s ever doubt about which one to trust going forward.
Escalate when something doesn’t add up. Wildly inconsistent readings across repeated attempts, symptoms like dizziness or chest discomfort alongside an unusual reading, or a device that suddenly reads far outside a patient’s normal range all warrant a second check with a different, known-accurate device before anyone acts on the number.
What Most Trainees Get Wrong About Cuff Technique
The biggest misconception I run into isn’t about the equipment. It’s the assumption that digital automatically means accurate. An oscillometric monitor is not measuring blood pressure the way a stethoscope does. It’s inferring it from an oscillation envelope and running that data through an algorithm nobody outside the manufacturer can fully inspect. That’s not a flaw exactly, but it’s a limitation clinicians and patients alike tend to forget the moment a number appears on a screen.
The second misconception follows close behind: that wrist devices are just a more convenient version of the same measurement. They’re not. Hydrostatic position matters enormously at the wrist because it’s smaller and easier to hold in the wrong spot relative to the heart, and that positioning error compounds with every degree the wrist tilts away from level.
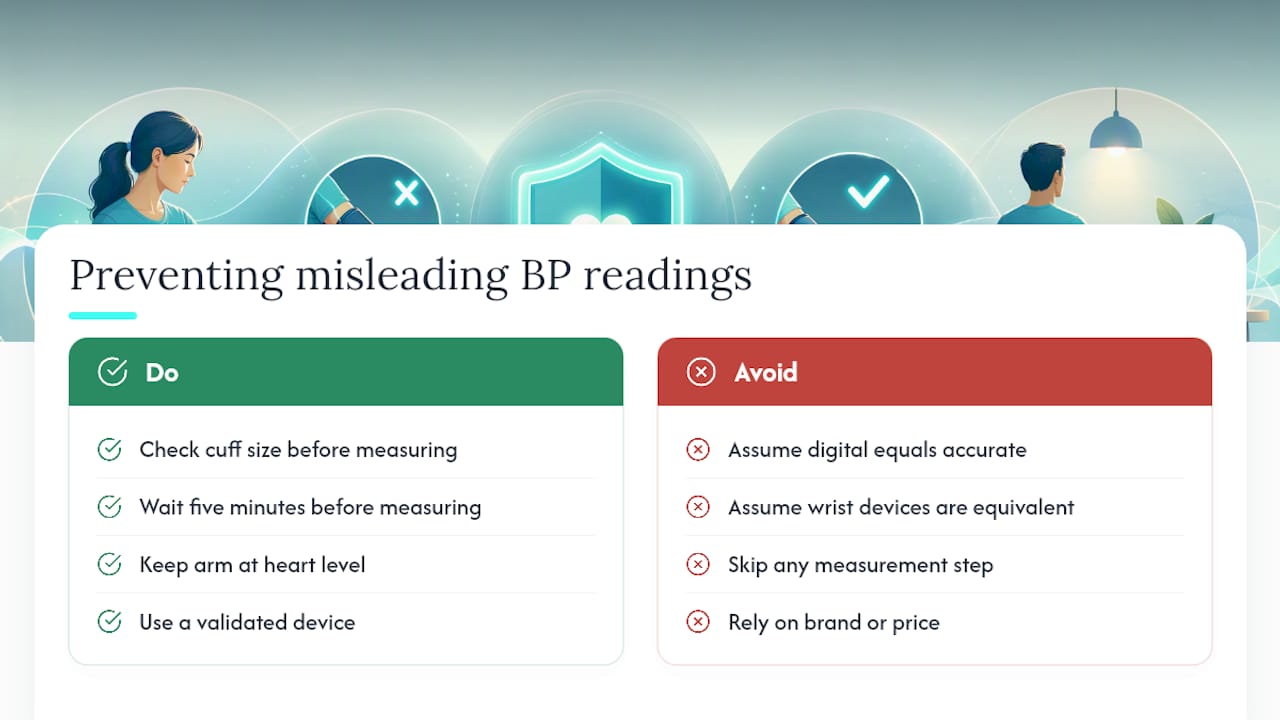
What actually separates a reliable reading from a misleading one has almost nothing to do with brand or price point. It comes down to whether someone bothered to check cuff size, waited the five minutes, kept the arm at heart level, and used a device that’s actually been validated against a reference standard. Skip any one of those steps and you can turn a perfectly good $30 manual sphygmomanometer into a source of bad data, or a $150 automated monitor into the same thing. Technique is the variable that matters most, and it’s also the one that costs nothing to get right.
That has real consequences downstream. A blood pressure reading that’s off by 10 or 15 mmHg because of a badly fitted cuff can be the difference between a patient starting antihypertensive medication they didn’t need and one going untreated for months. Standardized technique isn’t a formality tacked onto training programs. It’s the thing that keeps a diagnosis from being decided by a coin flip disguised as a number on a screen.
Where to Source Cuffs and Accessories That Hold Up in Practice
Getting the physics right matters little if the equipment itself is inconsistent, worn out, or the wrong size for the patients you actually see. Queenssurgical stocks upper-arm blood pressure cuffs across the full sizing range, from pediatric through large adult and thigh cuffs, so clinics aren’t stuck compromising accuracy because only one size was in stock.

Between patients, hygiene matters as much as calibration. A BP cuff barrier sleeve keeps cross-contamination risk down without adding meaningful bulk to the reading, and it’s worth stocking alongside nitrile examination gloves for any practice running frequent cuff measurements throughout the day. Clinics building out a broader consumables order can also browse medical products commonly stocked by providers for related items worth adding to the same cart.
If your practice is still relying on aging aneroid dials or mismatched cuff sizes, that’s the fastest fix available, and it’s one clinics can make this week rather than waiting on a budget cycle. Browse the current cuff and accessory catalog at Queenssurgical and place an order sized to your patient population before the next batch of appointments.
Frequently Asked Questions
How do blood pressure cuffs work to measure two different numbers? The cuff first stops blood flow entirely, then as pressure releases, it catches two distinct physiologic events: turbulent flow resuming at systolic pressure and flow smoothing into laminar movement at diastolic pressure.
Why do manual and automated readings sometimes disagree? Manual auscultation listens for Korotkoff sounds directly, while oscillometric devices estimate values from a pressure oscillation envelope using proprietary algorithms, so small differences between methods are expected rather than a sign either device is broken.
What is the auscultatory gap and why does it matter? It’s a temporary silent period during cuff deflation where Korotkoff sounds disappear and then return lower down. Inflating well above the point where the radial pulse vanishes prevents mistaking that gap for the true systolic pressure.
Does cuff size really change the reading that much? Yes. A cuff bladder too short or narrow for the arm requires more pressure to occlude the artery, which raises the reading, sometimes by a clinically significant margin.
Are wrist blood pressure monitors as accurate as upper-arm cuffs? Generally no. Wrist devices are far more sensitive to exact positioning relative to the heart, and even minor tilting introduces hydrostatic error that upper-arm cuffs are less prone to.
How often should a blood pressure cuff be checked for accuracy? Aneroid manometers should be checked against a calibrated reference periodically since their spring mechanism drifts over time, and any automated monitor showing readings that seem inconsistent should be cross-checked against a known-accurate device.
Sources
This article is general information, not a substitute for advice from a qualified doctor. Consult a qualified healthcare professional about your own circumstances before acting on anything here.
Recommended
Comments